How to Create a Lesson
Categories: LessonHow to Create a Lesson
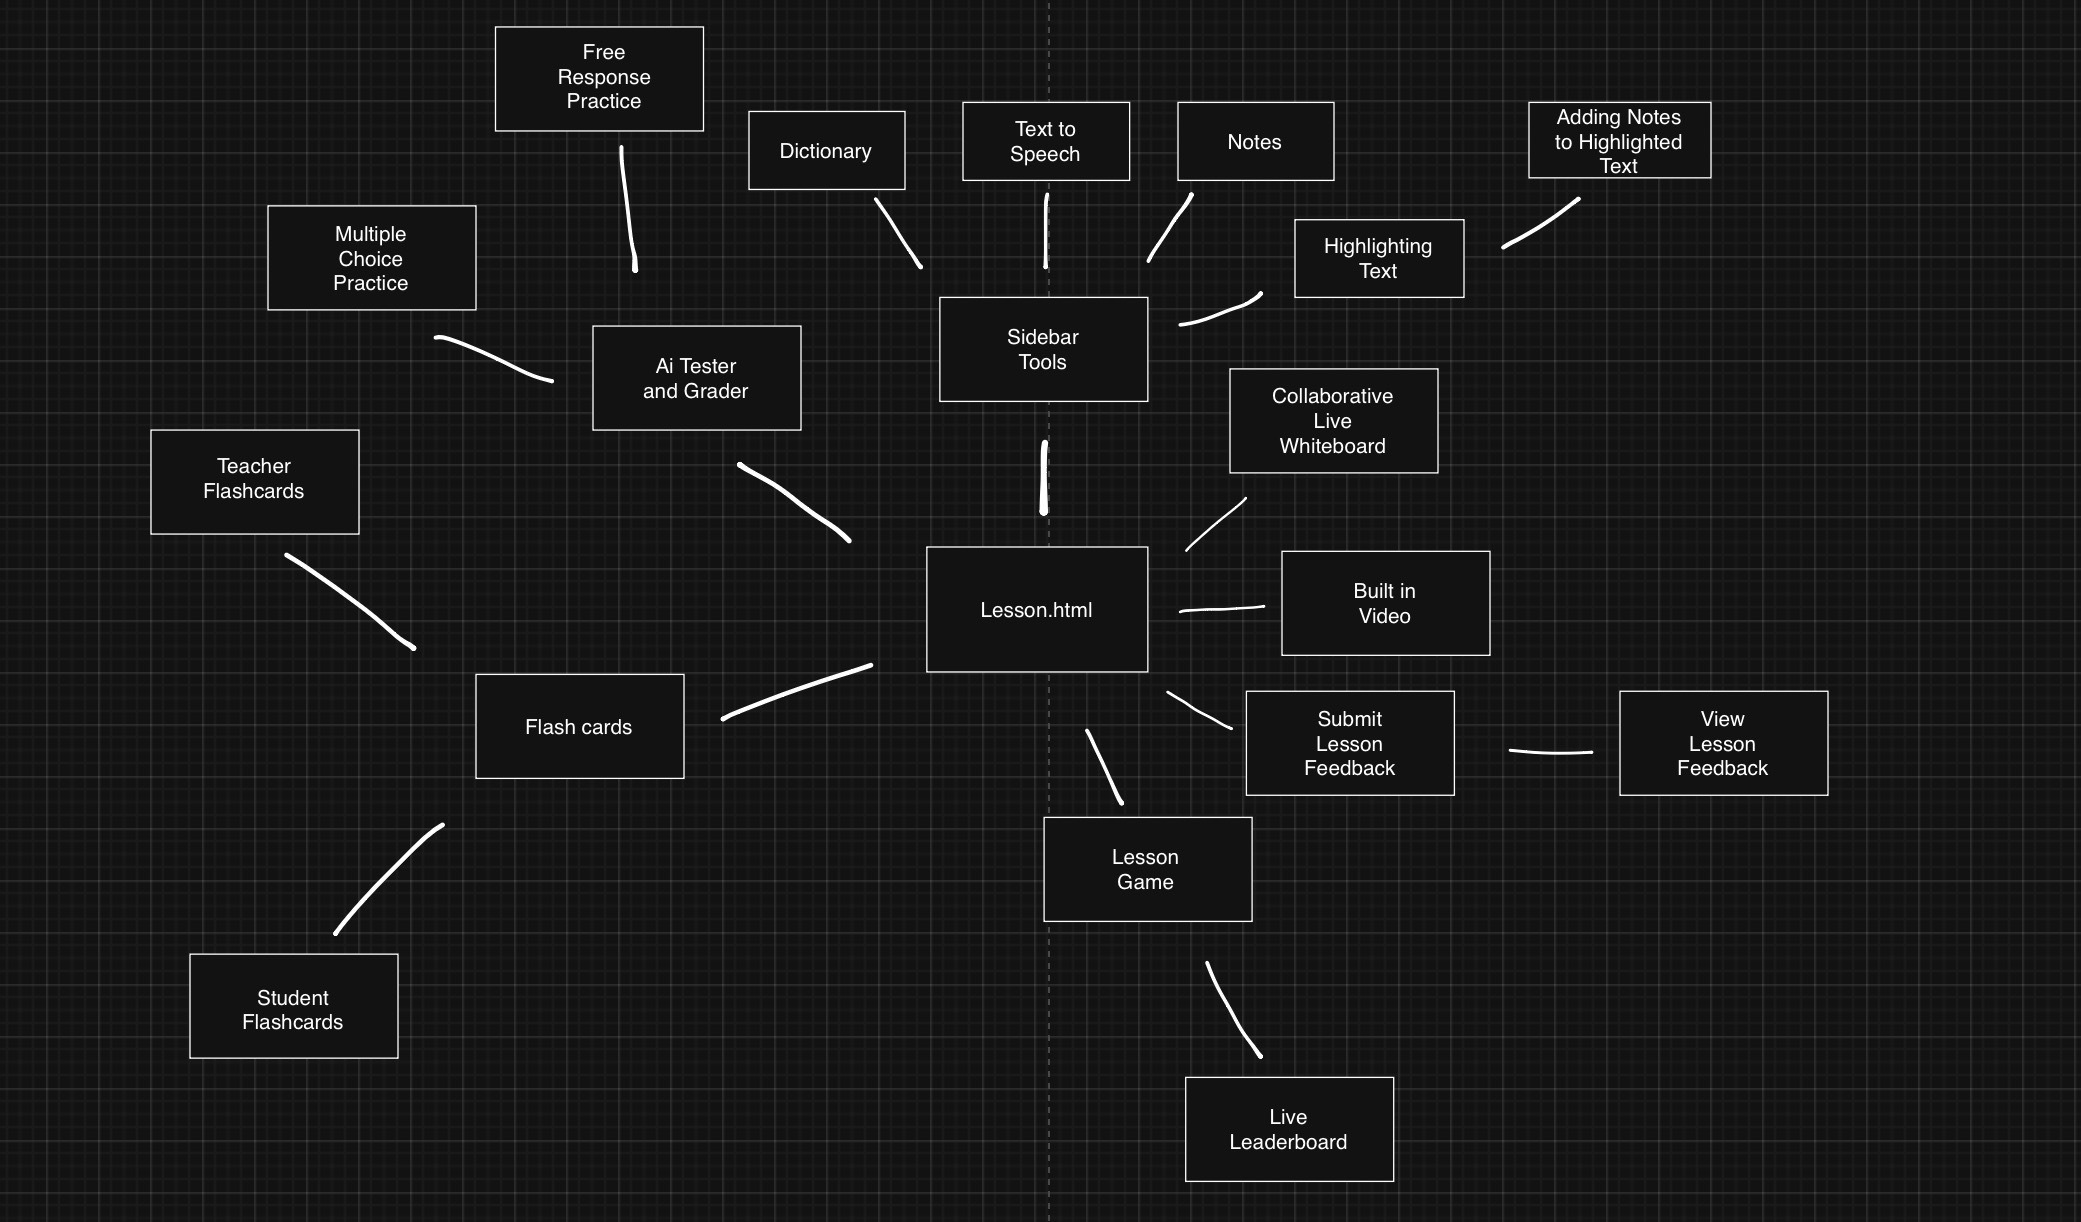
This guide walks you through how to design, build, and deploy an interactive coding lesson using lesson.html and cover.html. These layout templates are part of a modular system that makes it easy for teachers to assemble consistent, polished, and engaging lessons. The system supports multimedia, code execution, student input, live feedback, and collaborative tools.
🔗 Sample Lesson: Want to see what a final lesson looks like? View a live example here.
📁 Step 1: Understand the Purpose of Each File
🧩 lesson.html (Base Layout)
This is the core layout used by all coding lessons. It defines the structure and style and includes embedded functionality such as localStorage, animations, and in-browser code execution. Think of this as the underlying skeleton.
✅ You do not need to modify this file. It automatically wraps your lesson content.
- Stylish code formatting and dark theme styling
- Popcorn Hack support for both JavaScript and Python
- Feedback poll integration for student input
- Smooth section animations
- Automatic saving of responses via local storage
🧪 function.html (Lesson Template)
This file demonstrates how to use the function.html base layout and inject lesson-specific content. It contains the content area, lesson instructions, and references to interactive components. Put this file inside the lessons inside the navigation directory.
At the top is a YAML frontmatter block that sets the lesson metadata:
layout: lesson
title: Introduction to Functions
video_url: https://youtube.com/yourvideo
hack_prompt: Write a function that adds two numbers.
permalink: /functions
flashcard: functions_flashcard
game: functions_game
category: ['Lesson']
You’ll customize this file every time you create a new lesson.
🛠️ Step 2: Create a New Lesson File
- Duplicate
cover.html
Rename it based on your lesson topic:loops.html,arrays.html, etc. - Edit the Frontmatter
Update:title: Displayed at the top of the lessonvideo_url: YouTube video to support the topichack_prompt: Coding challenge or discussion questionpermalink: The URL path for the lesson
- Write Your Lesson Content
Inside<div id="lesson-content">, add your instructions, code snippets, visuals, and explanations.
<div id="lesson-content">
  <h2>What is a Loop?</h2>
  <p>Loops let you run the same block of code multiple times.</p>
  <pre><code>for (let i = 0; i < 5; i++) {
    console.log(i);
  }</code></pre>
</div>
🧩 Step 3: Add Interactive Components
Pick the features that fit your lesson. All components are modular and easy to include:
| Feature | Include Syntax | Description |
|---|---|---|
| 📺 Video Player | include video.html | Shows a YouTube video defined in frontmatter |
| ✍️ Whiteboard Viewer | include whiteboard.html | Lets students see a live whiteboard via board code |
| 🤖 AI Quiz Tool | include ai_comprehension.html | Students can generate practice questions using AI |
| 💻 Code Prompt | include hack.html | Lets students type, run, and save code responses |
| 🃏 Flashcards | include flashcards.html | Pulls cards from YAML, allows flipping, review, tracking |
| 📝 Student Notes | include flashcard-notes.html | Students build and review their own flashcards |
| 🎮 Quiz Game | include game.html | Multiplayer quiz game with leaderboard and timers |
| 👍 Poll | include poll.html | Students rate the lesson and add comments |
| 🧠 Sidebar | include slim_sidebar.html | Tools: dictionary, notes, read-aloud, highlights |
🔍 Step 4: Check and Deploy
- ✅ Verify Includes Exist
If you addedinclude game.html, make sure that file exists in your project. - 🧪 Test the Page
Open the file in a local preview environment. Interact with every component:- Click through flashcards
- Enter and run code
- Submit the poll
- Try the AI comprehension checker
- 🚀 Deploy It
Once everything works, publish it to your lesson site or LMS.
👩🏫 Best Practices for Teachers
- Keep Each Lesson Focused: Target one concept per lesson (e.g., “while loops” or “if statements”).
- Use Visuals Early: Embed videos or show a whiteboard before diving into code.
- Prompt Reflection: Include polls, notes, or AI questions to get students thinking.
- Encourage Review: Use flashcards at the end to reinforce terminology.
- Save Time with Reusables: Once you build a tool like
whiteboard.html, you can reuse it in all lessons.
✅ Summary Checklist
- [ ] Duplicate
cover.html - [ ] Fill in frontmatter (title, video, prompt, permalink)
- [ ] Add content inside
lesson-content - [ ] Choose and insert interactive components
- [ ] Confirm
includefiles exist - [ ] Preview and test locally
- [ ] Deploy when everything is working
With this layout system, you can build high-quality, interactive lessons that are modular, student-friendly, and easy to maintain. Whether you're teaching loops, functions, or arrays, these templates give you a powerful way to bring your content to life.
🔮 Future Vision
This layout system is already modular and easy to deploy, but it can evolve into a full-fledged interactive learning platform with deeper integration of backend and analytics.
Goals for Expansion
1. User Accounts
- Add student and teacher login via a Flask backend
- Use sessions or JWT for secure access control
2. Data Storage & Progress Tracking
- Migrate all localStorage-based components (code input, flashcards, highlights, quiz answers) to a database (PostgreSQL or MongoDB)
- Track individual student progress, AI quiz performance, and code history
3. Gamification
- Teachers can award tokens, badges, or achievements stored in a user profile
- Completion of tasks like flashcards or code prompts could unlock new content or feedback
4. Teacher Dashboard
- View all student progress in one place
- Set deadlines, unlock features per student/class
- Review code submissions, flashcards created, and quiz attempts
5. Shared Libraries
- Enable students to share flashcard decks
- Create a gallery of teacher-curated lessons with import options
Long-Term Vision
By layering backend support and real-time analytics on top of the existing modular system, this framework could become a lightweight LMS that is:
- Interactive and student-friendly
- Data-rich for teachers
- Easy to maintain and extend for developers
🃏 Use these flashcards to review each interactive component: what it does, where it goes, and when to use it in a lesson.
📚 Flashcard Notes
📝 You can also add your own flashcards about additional features or customization ideas as you experiment with the layout system.